
LITTLE LAMPY INTERIOR TOUR

The time has finally come to reveal the interior of the Little "Lampy" Camper in all of its teeny tiny glory! The official square footage of LL is roughly 150 feet (at least that's about how much flooring we bought - more on that later) and we've kept it light and bright to make the space feel open when it's jam packed full of people!
First up, this is how the "bedroom" end of LL looked when we brought her home in July 2017:

and the after:

And the dining side before:

and after:

The whole overhaul took us about 5 months to the day and cost around $3,600 not including the photo booth electronics and equipment that we already had. The interior walls are the lightest possible shade of pink (Magnolia's Antique Rose from Ace Hardware).
For a full look at the process, get that scrolling finger ready!
We started out by removing all of the old cabinets and paneling:

Then came removing the old insulation:

Then we were left with a LOT of rotten wood:

From there, it was a matter of removing the skin (you can see a pic of one small section removed in my last post), rebuilding the frame with new wood, and reattaching the skin (easy peasy!)

Then it was time to do the wiring:

re-insulate and put up the walls:

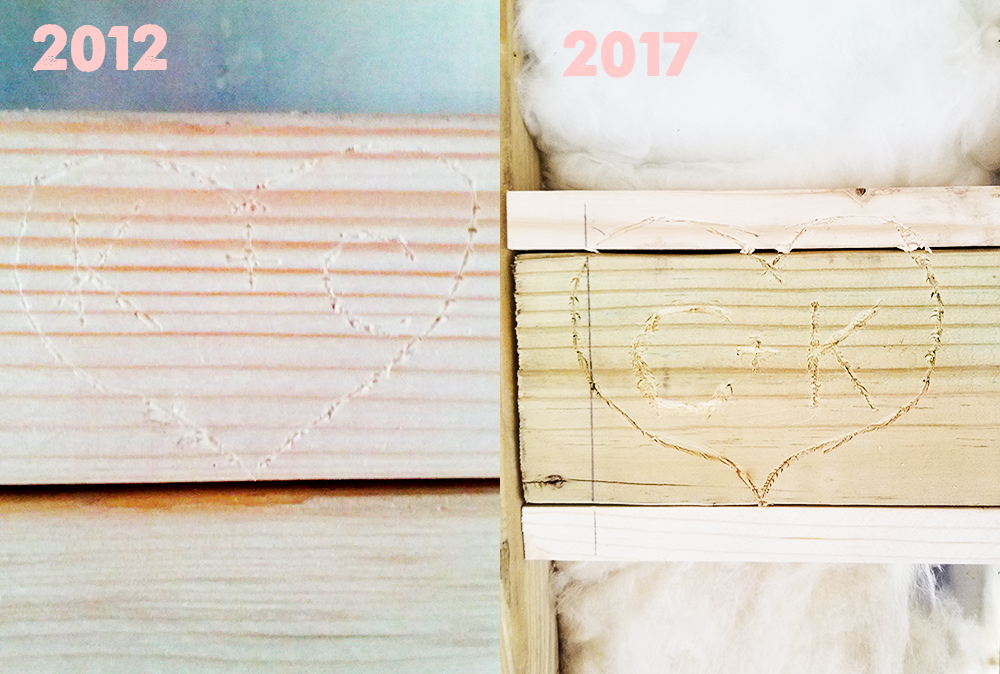
If you're eagle eyed, you might see a little something carved on one of the studs in the pic above. Since we've done two of these campers now we figured we should keep the tradition going and carve our initials into it somewhere. Here's our initials in the original Lampy Camper from 2012 and the Little Lampy Camper in 2017:
Lastly, we build the cabinets and put in the flooring and trim. We stuck (pun intended) with peel and stick flooring just like the first camper because it has done just fine for the past five years. It's easy to clean, not very expensive, and this particular color doesn't show a lot of dirt.

And that's pretty much it! Of course, it was a LOT more work than a blog post can ever cover and I've skimmed over some of the details but all this to say it's pretty great now that we're all done and I couldn't be happier with how it turned out.
I've already done a couple of DIY decorating projects in the camper like this honeycomb installation right when you walk in:

And of course, adding some little touches like these awesome Heartlandia Stickers from Vortex Souvenir:

And I'm super excited to get out and add some more decorations to the inside as the weather warms up and it's not a race against time and numb fingers to work outside ; )

For now though, it's back to business. The Little Lampy Camper has its very first wedding next week and we've already got a lot of other awesome public events planned for 2018!


Thanks for following along on this little journey with us! If you see the Little "Lampy" Camper out and about, be sure and say "Hi!" and of course, if you have an awesome event or wedding coming up, be sure and Contact Us about bringing LL to the party!